
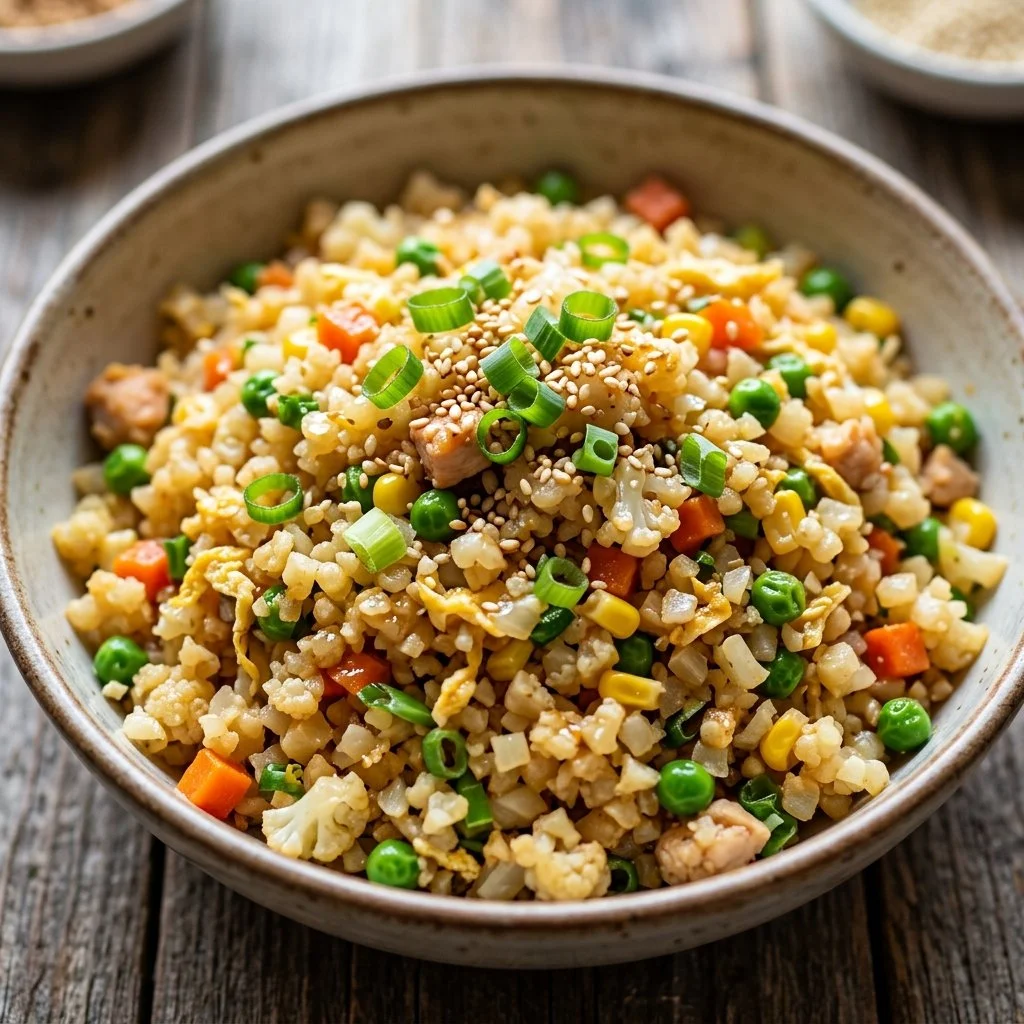
There’s something magical about finding a way to transform a familiar favorite into a lighter, healthier dish without sacrificing flavor or satisfaction. One evening, as I rummaged through my fridge, I came across a lonely head of cauliflower tucked behind the carrots and salad greens. It was the perfect opportunity to whip up a guilt-free, delicious version of fried rice. This dish, brightened with colorful veggies and packed with flavor, quickly became a staple in my kitchen, satisfying cravings while steering clear of heavy takeout.
And that’s how my journey with Cauliflower Fried Rice began—a dish that turns simple ingredients into a vibrant feast for the eyes and stomach. This recipe is one of my favorite go-to weeknight dinners, and it’s easy enough to whip up even on the busiest of days.
Recipe Timing
- Prep Duration: 10 minutes
- Active Cooking: 15 minutes
- Total Duration: 25 minutes
- Portion Size: Serves 4
- Complexity: Simple
Nutritional Recipe
- Calories per portion: Approximately 150
- Protein: 6g per serving
- Carbs: 10g per serving
- Fats: 8g per serving
- Fiber: 4g per serving
- Sugars: 2g per serving
- Sodium: 400mg per serving
Why You’ll Love This Cauliflower Fried Rice
Imagine the comforting, savory aroma of fried rice wafting through your kitchen, only to discover it’s a lightened-up version that leaves you feeling energized instead of weighed down. This Cauliflower Fried Rice balances the tender, nutty texture of the cauliflower with crisp vegetables, offering a delightful crunch with every bite. Whether you’re a health-conscious eater or just seeking something new, this dish is sure to become a favorite. Plus, the versatility of adding in your choice of proteins or spices means it can fit any taste or dietary need.
The Complete Cooking Journey
Cooking this Cauliflower Fried Rice is as much about the process as it is about the final dish. Each step is simple yet satisfying, allowing you to immerse yourself in the rhythm of chopping, sautéing, and stirring. As the garlic begins to sizzle and the colors of your fresh ingredients come to life, you’ll find yourself drawn into the joy of creating a meal from scratch.
Ingredients:
- 1 head of cauliflower
- 2 tablespoons vegetable oil
- 2 eggs
- 1 cup mixed vegetables (carrots, peas, bell peppers)
- 3 green onions, chopped
- 2 cloves garlic, minced
- 2 tablespoons soy sauce
- Salt and pepper to taste
Method:
Step 1: Preparing the Cauliflower
Rinse the cauliflower under cold water and remove the leaves and stem. Grate it or pulse it in a food processor until it resembles rice. This is your base and will take the place of traditional rice in this dish.
Step 2: Heating the Oil
Heat the vegetable oil in a large skillet over medium heat. It’s important to get the oil nicely heated before adding the garlic, allowing it to sizzle beautifully.
Step 3: Sautéing the Garlic
Add the minced garlic to the skillet and sauté for about 30 seconds. This quick step infuses the oil with an irresistible aroma that sets the stage for the rest of your dish.
Step 4: Cooking the Mixed Vegetables
Next, toss in the mixed vegetables and cook for another 3-4 minutes. You want them to be tender but still have a bit of crunch. Keep stirring to prevent any sticking.
Step 5: Scrambling the Eggs
Push the veggies to one side of the skillet, then crack the eggs into the empty space. Scramble these until cooked through, creating a little breakfast-like delight amongst your stir-fried mix.
Step 6: Adding the Riced Cauliflower
Now, add the riced cauliflower to the skillet. Pour in the soy sauce and mix everything well. This step is where the magic happens—the cauliflower starts to absorb all those incredible flavors.
Step 7: Stir-Frying Together
Stir-fry everything together for another 5 minutes. Listen to the satisfying sounds of your creation as it cooks; this is a sign that you’re almost there!
Step 8: Seasoning and Serving
Finally, season with salt, pepper, and sprinkle the chopped green onions before serving. This final touch adds a fresh burst of flavor, making your dish visually appealing too!
Serving Suggestions & Pairings
Serve your Cauliflower Fried Rice with grilled chicken, shrimp, or tofu to make it a well-rounded meal. It pairs wonderfully with a side of steamed dumplings or a light green salad for a more complete and satisfying dinner.
Storage & Leftovers Guide
If you find yourself with leftovers (though I doubt you will!), store them in an airtight container in the fridge for 3-4 days. Reheat in the microwave or sauté on the stovetop, adding a splash of soy sauce to refresh the flavors.
Kitchen Wisdom & Success Tips
- Make sure not to over-process the cauliflower; it should look like rice but not mushy.
- Feel free to customize the mixed vegetables based on what you have at hand—zucchini, corn, or snap peas are great options!
- Keep the heat at medium; this allows for even cooking without burning.
Flavor Variations & Adaptations
For a spicier kick, add chili flakes or a dash of sriracha when adding the soy sauce. You can also incorporate different sauces like teriyaki for a sweet twist or use coconut aminos for a soy-free version.
Reader Questions & Solutions
- Can I use frozen cauliflower rice? Absolutely! It’s a great time-saver; just sauté it for a few more minutes to remove any excess moisture.
- What if I don’t like eggs? You can skip the eggs or replace them with scrambled tofu for a vegan option.
- Can I make this ahead of time? Totally! It’s perfect for meal prep; just store it in individual portions.
- How do I make it more filling? Add cooked chicken, beef, or any leftover protein you have to make it a heartier meal.
- Can I use other sauces instead of soy sauce? Yes! Try tamari for a gluten-free option or a homemade stir-fry sauce for a unique flavor.
Wrapping Up
So, the next time you find yourself with a head of cauliflower in your kitchen, don’t overlook its potential! This Cauliflower Fried Rice not only brings health and vibrancy to your table but also weaves a wholesome story of culinary creativity. Embrace the ease of this recipe and the pleasure it brings, knowing that with each bite, you’re savoring a dish that is as nutritious as it is delicious. Happy cooking!
PrintCauliflower Fried Rice

A guilt-free, delicious version of fried rice made with riced cauliflower and colorful veggies.
- Prep Time: 10 minutes
- Cook Time: 15 minutes
- Total Time: 25 minutes
- Yield: 4 servings 1x
- Category: Main Course
- Method: Stir-Frying
- Cuisine: Asian
- Diet: Vegetarian
Ingredients
- 1 head of cauliflower
- 2 tablespoons vegetable oil
- 2 eggs
- 1 cup mixed vegetables (carrots, peas, bell peppers)
- 3 green onions, chopped
- 2 cloves garlic, minced
- 2 tablespoons soy sauce
- Salt and pepper to taste
Instructions
- Rinse the cauliflower under cold water and remove the leaves and stem. Grate it or pulse it in a food processor until it resembles rice.
- Heat the vegetable oil in a large skillet over medium heat.
- Add the minced garlic to the skillet and sauté for about 30 seconds.
- Next, toss in the mixed vegetables and cook for another 3-4 minutes.
- Push the veggies to one side of the skillet, then crack the eggs into the empty space and scramble until cooked.
- Add the riced cauliflower to the skillet and pour in the soy sauce; mix everything well.
- Stir-fry everything together for another 5 minutes.
- Season with salt, pepper, and sprinkle the chopped green onions before serving.
Notes
Customize the mixed vegetables based on what you have at hand. For a spicier kick, add chili flakes or sriracha.
Nutrition
- Serving Size: 1 serving
- Calories: 150
- Sugar: 2g
- Sodium: 400mg
- Fat: 8g
- Saturated Fat: 1g
- Unsaturated Fat: 7g
- Trans Fat: 0g
- Carbohydrates: 10g
- Fiber: 4g
- Protein: 6g
- Cholesterol: 90mg