
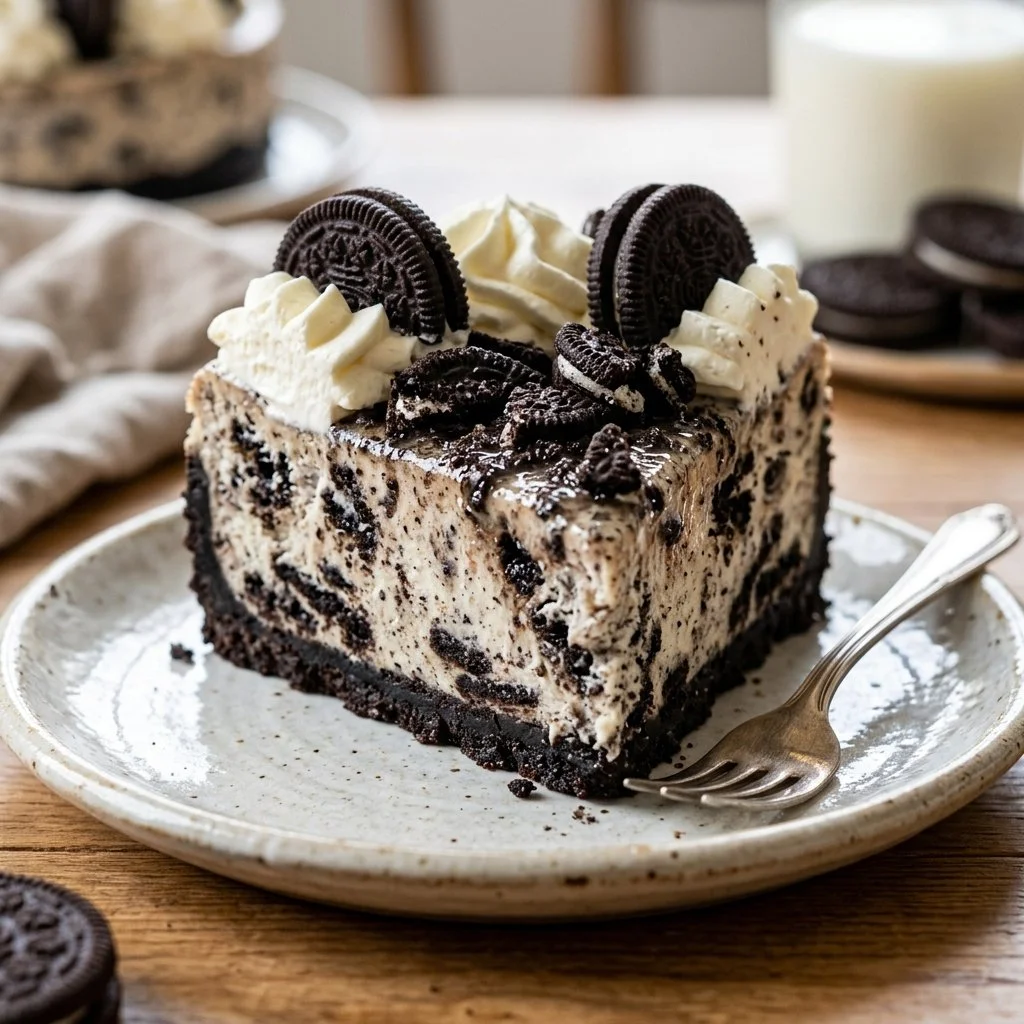
There’s something undeniably magical about dessert, especially when it comes to baking (or in this case, not baking) sweet delights that bring people together. I still remember the first time I laid eyes on a No-Bake Oreo Cheesecake. It was at my friend’s birthday celebration; the creamy, rich filling had a grazing surface dotted with crushed Oreo pieces. It felt like a fairytale come to life—one that involved indulgent simplicity combined with nostalgia wrapped in every bite. Every spoonful transported me right back to my childhood days, where Oreos were the quintessential treat, savored and shared.
Fast forward to today, I have mastered the art of recreating that very cheesecake, and I can promise you—it’s incredibly easy! This no-bake version requires minimal time and effort, yet offers immense flavor and satisfaction. You’re just minutes away from impressing friends, family, or even just treating yourself!
Recipe Timing
- Prep Duration: 20 minutes
- Active Cooking: 10 minutes
- Total Duration: 4 hours, 20 minutes (including chilling time)
- Portion Size: Serves 10-12
- Complexity: Simple
Nutritional Recipe
- Calories per portion: Approximately 350
- Protein: 4 grams
- Carbs: 33 grams
- Fats: 24 grams
- Fiber: 1 gram
- Sugars: 16 grams
- Sodium: 270 mg
Why You’ll Love This No-Bake Oreo Cheesecake
What’s not to love? This No-Bake Oreo Cheesecake is the epitome of decadence. It’s rich, creamy, and subtly sweet, with that familiar nostalgic crunch of Oreo cookies in every bite. Perfectly suited for any occasion, be it a dinner party or a cozy night in, it delivers the feel-good vibes we all crave. Plus, since it’s no-bake, you can whip it up without breaking a sweat—perfect for new bakers and seasoned pros alike!
The Complete Cooking Journey
Let me guide you through each delightful step of making this no-bake masterpiece. Picture yourself in your kitchen, surrounded by the comforting scents of dessert in the making. With each mix and fold, you’re building layers of flavor and love—let’s get started!
Ingredients:
- 24 Oreo cookies, crushed
- 1/2 cup butter, melted
- 2 cups cream cheese, softened
- 1 cup powdered sugar
- 1 teaspoon vanilla extract
- 2 cups whipped cream
- Additional Oreo cookies for garnish
Method:
Step 1: Prepare the Oreo Crust
In a bowl, combine the crushed Oreo cookies with the melted butter. This combination will transform into a crumbly base that perfectly complements the creamy filling. Press this mixture into the bottom of a springform pan, ensuring it’s evenly distributed. Your crust is the foundation of this delicious dessert!
Step 2: Beat the Cream Cheese Mixture
In another bowl, beat together the softened cream cheese, powdered sugar, and vanilla extract until smooth. You’ll want a rich, velvety texture here—no lumps allowed! Give your arm a little workout and be patient; this will add a beautiful creaminess to your cheesecake.
Step 3: Fold in the Whipped Cream
Next, it’s time to gently fold in the whipped cream. This step requires a tender hand, as we want to maintain that wonderful airy texture without deflating our fluffy clouds of cream. Once fully combined, your cheesecake filling is ready to shine!
Step 4: Combine and Chill
Pour the luscious cream cheese mixture over the prepared Oreo crust in the springform pan. Smooth the top with a spatula for an elegant finish. Now, cover it and place it in the refrigerator to chill for at least 4 hours, or until it sets nicely. Trust me, the wait is worth it!
Step 5: Garnish Before Serving
When you’re ready to serve, don’t forget to add a touch of elegance by garnishing with additional Oreo cookies on top. It gives a lovely visual appeal and lets your guests know exactly what they’re in for!
Serving Suggestions & Pairings
Serve this No-Bake Oreo Cheesecake with a dollop of fresh whipped cream or a drizzle of chocolate sauce for an extra treat. It pairs beautifully with coffee or a tall glass of cold milk—perfect for enhancing those Oreo flavors we all love!
Storage & Leftovers Guide
Leftover cheesecake? Yes, please! Store any leftovers in an airtight container in the fridge for up to 4 days. This treat holds up wonderfully, making it a great dessert to enjoy over the week—or even longer if you freeze it!
Kitchen Wisdom & Success Tips
- Make sure your cream cheese is softened to room temperature for the smoothest mixing experience.
- Don’t rush the chilling time; allowing the cheesecake to set properly is key to a beautiful slice.
- Use a hot knife (dip it in hot water and wipe it dry) for cleaner cuts when serving.
Flavor Variations & Adaptations
Feeling adventurous? Mix things up by adding a layer of chocolate ganache on top before chilling, or experiment with different cookies like peanut butter Oreos or your favorite sandwich cookie for a unique twist.
Reader Questions & Solutions
-
Can I use regular cream cheese?
Yes, just make sure it’s well-softened for easy blending! -
What if I don’t have a springform pan?
You can use any pan, just line it with parchment paper for easy removal. -
How can I make it gluten-free?
Substitute Oreo cookies with gluten-free cookies of your choice. -
Can I prepare this in advance?
Absolutely! This cheesecake is perfect for making the day before an event. -
How do I ensure it sets properly?
Be patient and follow the chilling time; the cooler it gets, the firmer it will be!
Wrapping Up
There you have it—your ultimate guide to crafting a No-Bake Oreo Cheesecake that is sure to impress! Simple ingredients and minimal effort come together to create a dessert that’s perfect for any occasion. So, gather your Oreos, channel your inner chef, and get ready to enjoy the sweetest creation that’s just a refrigerator away. Happy baking (or should I say, happy no-baking)!
PrintNo-Bake Oreo Cheesecake

An easy and decadent No-Bake Oreo Cheesecake with a creamy filling and a delightful Oreo crust, perfect for any occasion.
- Prep Time: 20 minutes
- Cook Time: 10 minutes
- Total Time: 260 minutes
- Yield: 10-12 servings 1x
- Category: Dessert
- Method: No-Bake
- Cuisine: American
- Diet: Vegetarian
Ingredients
- 24 Oreo cookies, crushed
- 1/2 cup butter, melted
- 2 cups cream cheese, softened
- 1 cup powdered sugar
- 1 teaspoon vanilla extract
- 2 cups whipped cream
- Additional Oreo cookies for garnish
Instructions
- Prepare the Oreo Crust: In a bowl, combine the crushed Oreo cookies with the melted butter. Press this mixture into the bottom of a springform pan.
- Beat the Cream Cheese Mixture: In another bowl, beat together the softened cream cheese, powdered sugar, and vanilla extract until smooth.
- Fold in the Whipped Cream: Gently fold in the whipped cream until fully combined.
- Combine and Chill: Pour the cream cheese mixture over the crust, smooth the top, and refrigerate for at least 4 hours.
- Garnish Before Serving: Add additional Oreo cookies on top for visual appeal.
Notes
Store leftovers in an airtight container in the fridge for up to 4 days. Perfect for making ahead of time.
Nutrition
- Serving Size: 1 slice
- Calories: 350
- Sugar: 16g
- Sodium: 270mg
- Fat: 24g
- Saturated Fat: 12g
- Unsaturated Fat: 8g
- Trans Fat: 0g
- Carbohydrates: 33g
- Fiber: 1g
- Protein: 4g
- Cholesterol: 50mg